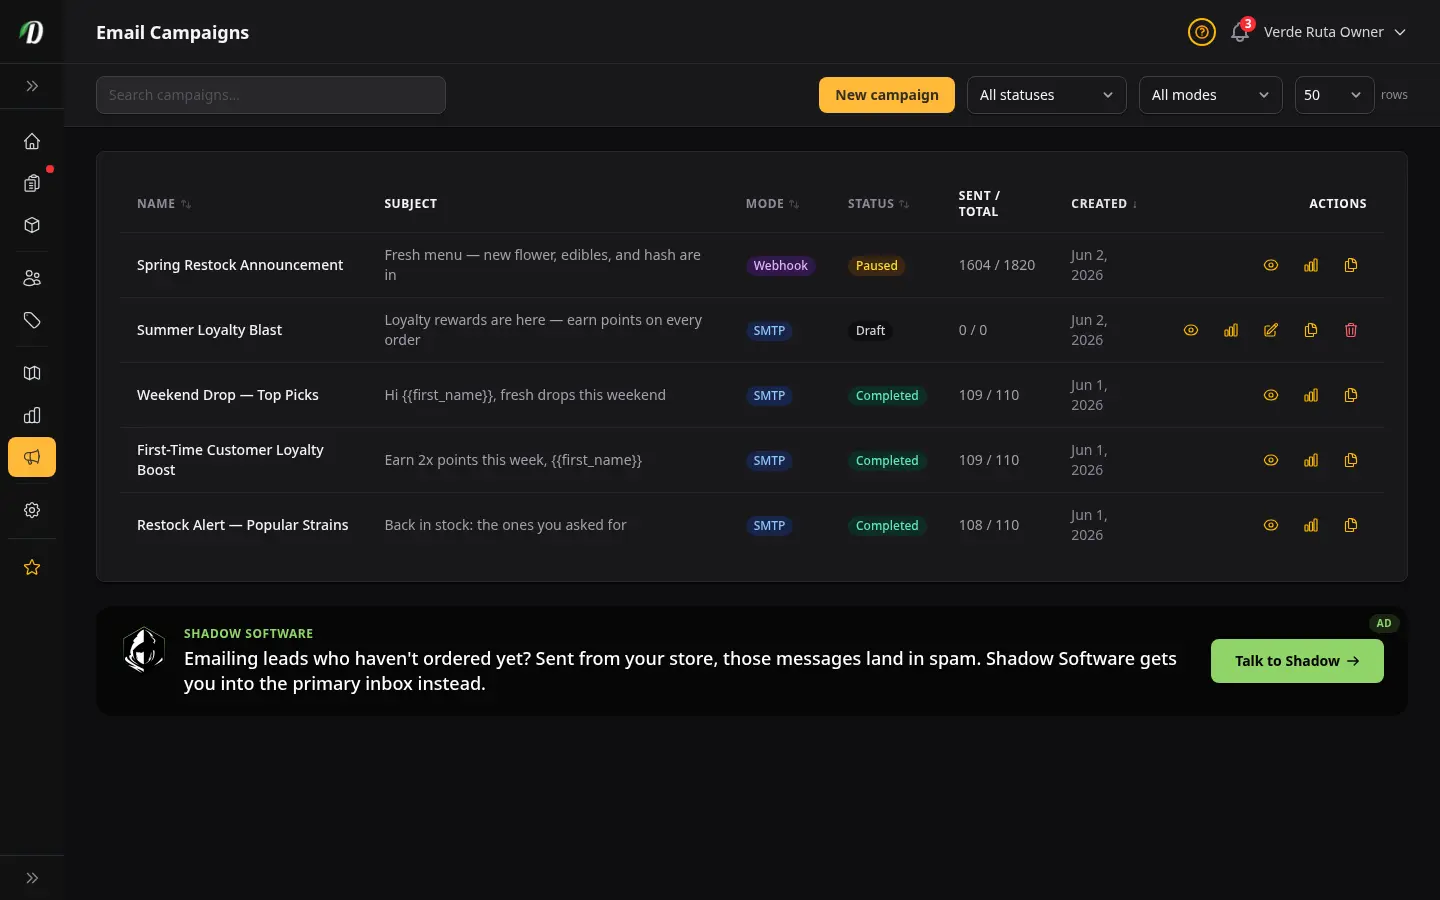
แคมเปญอีเมล
ส่งแคมเปญอีเมลถึงลูกค้าและรายชื่อผู้สนใจ ดูจำนวนผู้รับแบบสด ๆ ก่อนส่ง พร้อมติดตามยอดส่ง ข้อผิดพลาด และการหยุดพักแบบเรียลไทม์
เริ่มต้นอย่างรวดเร็ว
- เปิด การตลาด → แคมเปญอีเมล
- สร้างหรือนำเข้ารายชื่อผู้ติดต่อใน รายชื่อ
- คลิก แคมเปญใหม่ เลือกโหมด (SMTP หรือ Webhook) เขียนอีเมล แล้วเลือกรายชื่อของคุณ
- กด ส่งเลย หน้าจะพาไปยังหน้าสถิติแคมเปญ ที่คุณดูความคืบหน้าแบบเรียลไทม์ได้
ลูกค้า กับ ลีด
ผู้รับของคุณแบ่งเป็นสองกลุ่ม การแบ่งนี้สำคัญ เพราะแต่ละกลุ่มต้องใช้วิธีรับอีเมลที่ต่างกัน
- ลูกค้า คือคนที่เคยซื้อจากคุณ คุณส่งอีเมลถึงพวกเขาผ่านเซิร์ฟเวอร์ SMTP ของคุณเองได้
- ลีด คือคนที่คุณเก็บรายชื่อไว้แต่ยังไม่ได้ซื้อ ลีดต้องส่งผ่าน webhook ไปยังผู้ให้บริการภายนอกที่ดูแลชื่อเสียงการส่งให้คุณ
โหมด SMTP — สำหรับลูกค้าของคุณ
โหมด SMTP ใช้บัญชีอีเมลของร้านคุณในการส่ง ตั้งค่า SMTP ก่อนที่ ตั้งค่า → โดเมน & อีเมล SMTP ใช้กับลูกค้าเท่านั้น เพราะลูกค้าเชื่อถืออีเมลที่มาจากที่อยู่ของคุณเอง
โหมด Webhook — สำหรับลีด
โหมด Webhook จะส่งผู้รับแต่ละคนต่อให้ผู้ให้บริการอีเมลภายนอกของคุณ คุณตั้ง URL ในแต่ละแคมเปญ — เลือก Webhook เป็นโหมดการส่งแล้วกรอก URL ของ endpoint คุณ แต่ละแคมเปญใช้ webhook ต่างกันได้ ลีดควรส่งผ่านผู้ให้บริการ webhook เสมอ เพื่อให้การตีกลับและการร้องเรียนไม่ไปทำลายชื่อเสียงของร้านคุณ
กุญแจลงลายเซ็น
เราสร้าง กุญแจลงลายเซ็น ให้ในครั้งแรกที่คุณบันทึกแคมเปญ webhook เพื่อให้ endpoint ของคุณยืนยันได้ว่าแต่ละคำขอมาจากเราจริง ๆ ใช้ เปิดเผย เพื่อแสดง คัดลอก เพื่อวางลงในผู้ให้บริการของคุณ และ สร้างใหม่ ถ้ากุญแจถูกเปิดเผยออกไป — การสร้างใหม่จะทำให้กุญแจเก่าหยุดทำงานทันที ฉะนั้นให้อัปเดต endpoint ของคุณไปพร้อมกัน
เมื่อไหร่ควรใช้ SMTP หรือ Webhook
| ถ้าคุณกำลังส่งอีเมลถึง | ใช้โหมดนี้ |
|---|---|
| คนที่เคยซื้อจากคุณ | SMTP |
| คนที่ยังไม่ได้ซื้อ | Webhook |
| ผสมทั้งสองกลุ่ม | Webhook (ปลอดภัยกว่าสำหรับชื่อเสียง) |
การอัปโหลดรายชื่อแรกของคุณ
เปิด รายชื่อ คลิก รายชื่อใหม่ แล้วอัปโหลดไฟล์ CSV ที่มีหนึ่งอีเมลต่อหนึ่งแถว คอลัมน์แรกควรเป็นอีเมล โดยมีคอลัมน์ชื่อจริงและนามสกุลแบบเลือกได้ เราตัดรายชื่อซ้ำให้ตอนนำเข้า
การเขียนแคมเปญ
คลิก แคมเปญใหม่ ตั้งชื่อ เขียนหัวเรื่อง แล้วเขียนเนื้อหา คุณลากแล้ววางรูปลงในตัวแก้ไขได้เลย — เราอัปโหลดและโฮสต์ให้อัตโนมัติ ใช้ปุ่ม ส่งทดสอบ ก่อนส่งจริง เพื่อดูว่าอีเมลของคุณหน้าตาเป็นยังไงในกล่องจดหมายของคุณเอง
อธิบายขีดจำกัดการส่ง
ขีดจำกัดอีเมลช่วยปกป้องชื่อเสียงการส่งของคุณ การส่งเร็วเกินไปจะดูเหมือนสแปมในสายตาผู้ให้บริการอีเมล
- SMTP ตั้งค่าเริ่มต้นที่ 1 ฉบับต่อนาที และ 30 ฉบับต่อชั่วโมง
- ค่าเริ่มต้นของ Webhook สูงกว่า เพราะผู้ให้บริการของคุณจัดการจังหวะการส่งให้
- คุณลดขีดจำกัดได้ แต่เพิ่มเกินเพดานที่ปลอดภัยไม่ได้
การยกเลิกการรับ & การปฏิบัติตามกฎ
ทุกอีเมลที่เราส่งมีลิงก์ยกเลิกการรับแบบคลิกเดียว เราลบที่อยู่นั้นออกจากแคมเปญในอนาคตให้อัตโนมัติ — คุณไม่ต้องทำอะไรเลย สิ่งนี้ช่วยให้คุณทำตามกฎหมายต่อต้านสแปม
การอ่านบันทึกการส่งของคุณ
เปิดแคมเปญใดก็ได้แล้วคลิกแท็บ บันทึกการส่ง มีแค่ข้อผิดพลาดเท่านั้นที่ถูกบันทึก — การส่งที่สำเร็จจะไม่ถูกบันทึก แต่ละแถวแสดงผู้รับ ประเภทข้อผิดพลาด ข้อความรายละเอียดสั้น ๆ และสถานะ HTTP (สำหรับข้อผิดพลาด webhook) คลิก ดาวน์โหลด CSV เพื่อส่งออกทั้งหมด
ทำไมแคมเปญถึงหยุดเอง
ถ้า endpoint ของ webhook คุณตอบกลับเป็นข้อผิดพลาดสามครั้งติดต่อกัน เราจะหยุดแคมเปญให้อัตโนมัติ สิ่งนี้ช่วยปกป้องชื่อเสียงการส่งของคุณ และหยุดไม่ให้อีเมลดี ๆ ส่งไปยัง endpoint ที่พังอยู่ คุณจะเห็นแบนเนอร์ที่ด้านบนของหน้าสถิติแคมเปญเมื่อเกิดเหตุนี้
การเริ่มแคมเปญที่ถูกหยุดต่อ
แก้ปัญหาก่อน — ถ้า webhook ของคุณตอบกลับเป็นข้อผิดพลาด ให้เปิดแคมเปญ เลื่อนไปที่ส่วน Webhook endpoint แล้วใช้ ทดสอบ webhook เพื่อยืนยันว่า endpoint ของคุณตอบกลับได้ จากนั้นคลิก เริ่มต่อ การส่งจะดำเนินต่อจากจุดที่ค้างไว้
การแก้ปัญหาการส่งถึงปลายทาง
- ถ้าอีเมลของคุณตกไปอยู่ในสแปม ให้ส่งไปยังกลุ่มที่เล็กกว่าและมีส่วนร่วมมากกว่าก่อน เพื่ออุ่นเครื่องชื่อเสียงการส่งของคุณ
- ทำหัวเรื่องให้เจาะจงและเลี่ยงคำที่ดูเหมือนสแปม
- ถ้าอัตราการตีกลับสูง ให้ทำความสะอาดรายชื่อของคุณ — ลบที่อยู่ที่ตีกลับออกและอย่าส่งอีเมลถึงพวกนั้นอีก
- สำหรับลีด ให้ใช้โหมด webhook เสมอ เพื่อไม่ให้โดเมนของร้านคุณถูกใช้ส่งหาคนแปลกหน้า
คำถามที่พบบ่อย
ส่งแคมเปญอีเมลใน DabDash ยังไง?
ไปที่ การตลาด → แคมเปญอีเมล กด แคมเปญใหม่ เลือกโหมด SMTP หรือ Webhook เขียนหัวข้อและเนื้อหา เลือกลิสต์ผู้ติดต่อและว่าจะรวมลูกค้าด้วยไหม แล้วกด ส่งเลย แคมเปญจะเริ่มทันทีและคุณดูความคืบหน้าได้ที่หน้าสถิติ
ตัวอย่างผู้รับในแคมเปญอีเมลของ DabDash ทำงานยังไง?
แผง "ใครจะได้รับอันนี้" ใต้ฟอร์มแคมเปญจะอัปเดตแบบเรียลไทม์ตามการเลือกผู้รับของคุณ มันโชว์จำนวนผู้รับที่เข้าเกณฑ์แน่นอน กี่คนเป็นลูกค้าเทียบกับลีด และกี่ที่อยู่จะถูกข้ามเพราะไม่ผ่านการตรวจสอบอีเมล จำนวนจะปรับทันทีเมื่อคุณติ๊กหรือเอาติ๊กออกลิสต์ผู้ติดต่อ หรือตัวเลือก "รวมลูกค้า"
ทำไมบางที่อยู่ถูกข้ามในผู้รับแคมเปญ DabDash ของฉัน?
ที่อยู่ที่ถูกปักธงว่าเสี่ยงหรือไม่ถูกต้องโดยการตรวจสอบอีเมลจะถูกตัดออกก่อนส่ง ตัวอย่างผู้รับจะโชว์ว่ามีกี่ที่อยู่ที่จะถูกข้ามด้วยข้อความสีเหลือง นี่ช่วยปกป้องชื่อเสียงในการส่งของคุณ โดยเลี่ยงที่อยู่ที่มีโอกาสตีกลับ
ควรใช้ SMTP หรือ Webhook สำหรับแคมเปญอีเมลใน DabDash ตอนไหน?
ใช้ SMTP เพื่อส่งอีเมลถึงคนที่เคยซื้อจากคุณแล้ว — ลูกค้าของคุณเอง ใช้ Webhook เพื่อส่งถึงลีด (คนที่ยังไม่เคยซื้อ) โดยส่งผ่านผู้ให้บริการภายนอก การส่งหาคนแปลกหน้าผ่าน SMTP ของคุณเองเสี่ยงทำให้ชื่อเสียงการส่งเสียได้
ทำไมแคมเปญอีเมล DabDash ของฉันพักเองอัตโนมัติ?
ถ้าปลายทาง webhook ตอบกลับด้วยข้อผิดพลาดสามครั้งติดต่อกัน DabDash จะพักแคมเปญเพื่อปกป้องชื่อเสียงการส่งของคุณ แก้ปลายทางแล้วกด ทำต่อ การส่งจะเริ่มต่อจากตรงที่ค้างไว้พอดี